")
- Details
- Hits: 35853
User Rating: 4 / 5


Resistive attenuator
50 ohm 0..91 dB
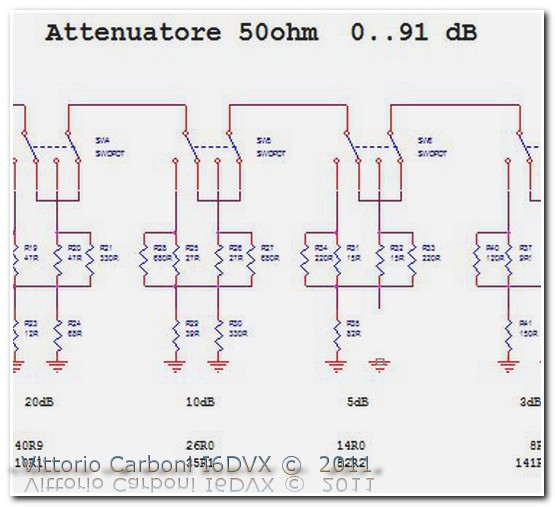
A simple design for the realization of a small attenuator to 50 ohms, with variable attenuation from 0 to 91 dB in steps of 1 dB. The attenuator and built on a small printed circuit board holdall of about 13.5 cm x 2.5 cm. The variation of attenuation is obtained with the microdeviatori Toggle, in steps of attenuation :1-2-3-5-10-20-20-30 dB. The resistive elements are of the SMD 1206. To achieve the required resistance values, starting from the standard values, are provided by resistors connected in parallel, as can be seen from the circuit diagram. For the attenuation values higher (20-30 dB), is mandatory to the use of electrostatic shields between the two sections of microdeviatori. It 'should not feed the attenuator with a power greater than 1 Watts.
Related Topics
Schematic: attenuator 50 ohm
PCB: PDF
PCB: gerber
- Details
- Hits: 21681
User Rating: 5 / 5
-
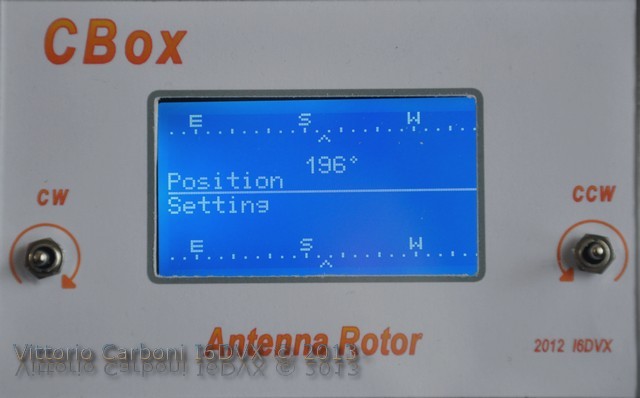
Updating the Control Box antenna rotor
In the February 2013 RadioKit Electronics issue, on p. 9-13, was published my article on a control box microprocessor. Normally between sending a piece and its publication a substantial period of time passes. Fortunately, this is a good omen for us experimenters, meaning that despite the difficulties in obtaining the materials and in, smaller and smaller devices, there are many ideas and innumerable proposed projects.
- Details
- Hits: 25318
User Rating: 5 / 5
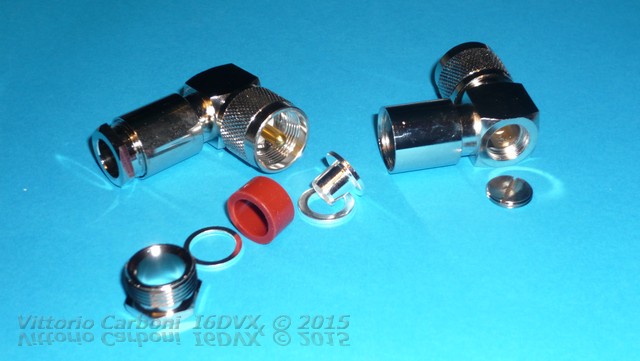 Plug UHF PL259 90°: Assembly
In the connections of our RTX cable antenna, UHF fittings at 90 ° very often are used, followed by classic PL259 as termination of the drop cable. I consider it unnecessary the use of the curve and then the connector, when on the marketthere are available connectors PL256 to 90 °. The problem is to find them! After looking, unsuccessfully, in national fieldfairs, for connectors PL 90 °, I found and purchased them in China through Ebay (lm4871n) at a fair price: $ 4 each.
Strangely, even during the holiday season, the connectors arrived in twenty days. They seem well made and the insulation, according to the statement of the seller, is Teflon (PTFE). Assembly is simple and quick, the photographs illustrate the different steps.
Photo 1 shows two maleconnectors PL 90 ° with accessories.
- The first operation consists in unsheathing the RG213 cable removing the sheath for a length of about 20 mm. I found a very convenient tool visible in photo 2: a small economic cutter . With little attention it's possible to cut the outer sheath without compromising the shielding copper below. Remember to insert in advance the cable fixing nut, the metal washer and the elastic sleeve. (3 photos)
- Remove sheath and insert the second metal washer, of smaller diameter, which will go to 'lean' on the edge of guania cut. (4 photos)
- Now you can 'laddering' the screen, opening it with a small screwdriver by stretching the shield and distributing evenly the conductors . (5 photos)
- Finally, insert the last element whose cylinder will be inserted between the insulation of the center conductor and the shield. Firmly push up to tighten the wires of the braid between the washer and the last insert, 'smoothing' then with a pair of scissors the conductors in excess. (7 photos)
- Now we have to remove 8 mm of insulation from the center conductor (photo 8), stagnate the conductor, and plug the cable into the connector housing. Tighten the outer nut fastening having the foresight, in case you are mounting the second connector, to guide them appropriately, relative to one another. For example the two 90 ° connectors can be addressed by same side or facing one on one side, the other to the opposite side, then tighten the fixing nut.
- The last connection remains, ie solder the center conductor to the central support of the connector. (10 photos)
-
 Drawing 1
Drawing 1
Drawing 1
-
Photo 01
Photo 01
-
Photo 02
Photo 02
-
Photo 03
Photo 03
-
Photo 04
Photo 04
-
Photo 05
Photo 05
-
Photo 06
Photo 06
-
Photo 07
Photo 07
-
Photo 08
Photo 08
-
Photo 09
Photo 09
-
Photo 10
Photo 10
-
Drawing 2
Drawing 2


http://www.i6dvx.it/en/lavori-in-corso.html#sigProId7cb7b0c606
- Details
- Hits: 43389
User Rating: 5 / 5

Ferrite, Balun and transformer EHT
Wandering around the net I've read the proposal for the use of ferrites recovered from transformers EHT (Extra Hight Tension) of televisions to make Balun.
The opinions about the use of these ferrites were not uniform but sufficiently intriguing.
Intrigued by the idea so I've got a group EHT disassembling an old frame of a TVC Grundig. The transformer with its windings as it appeared in the first picture.
I6DVX ended his trasmission from this Earth on the 22nd of October 2017 .
This site will be kept as he left it, because that's what he would have wished for.
73. Carboni Family

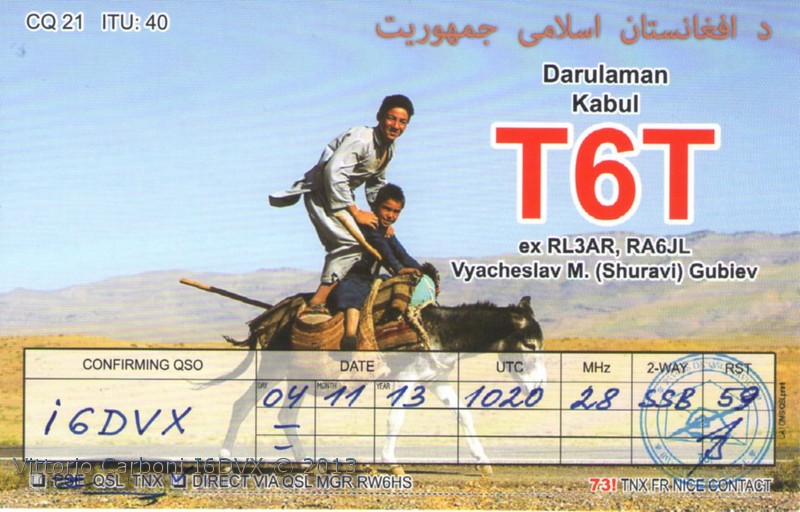
Random QSL images